Adding multimedia to your publication is as easy as adding Web, Email and Page Links using YUDU Publisher's Overlay Editor.
You can include MP4 video, MP3 audio and HTML assets. These can be embedded on page or placed within pop-up lightboxes. If you need assistance with the latter, don't hesitate to contact our support team.
You can also stream content into overlays, rather than uploading and embedding a file.

- Upload Your Multimedia
- Stream Multimedia from YouTube/Remote Server
- Trigger Visibility of Content (Show/Hide)
Upload Your Multimedia
Please Note: You can skip this step if streaming content into your digital publication.
To upload your file(s), click Files in the top right menu to go to the Files section:
The Files section allows you to view any files that have been uploaded to this particular publication, including the origianl PDF file(s).
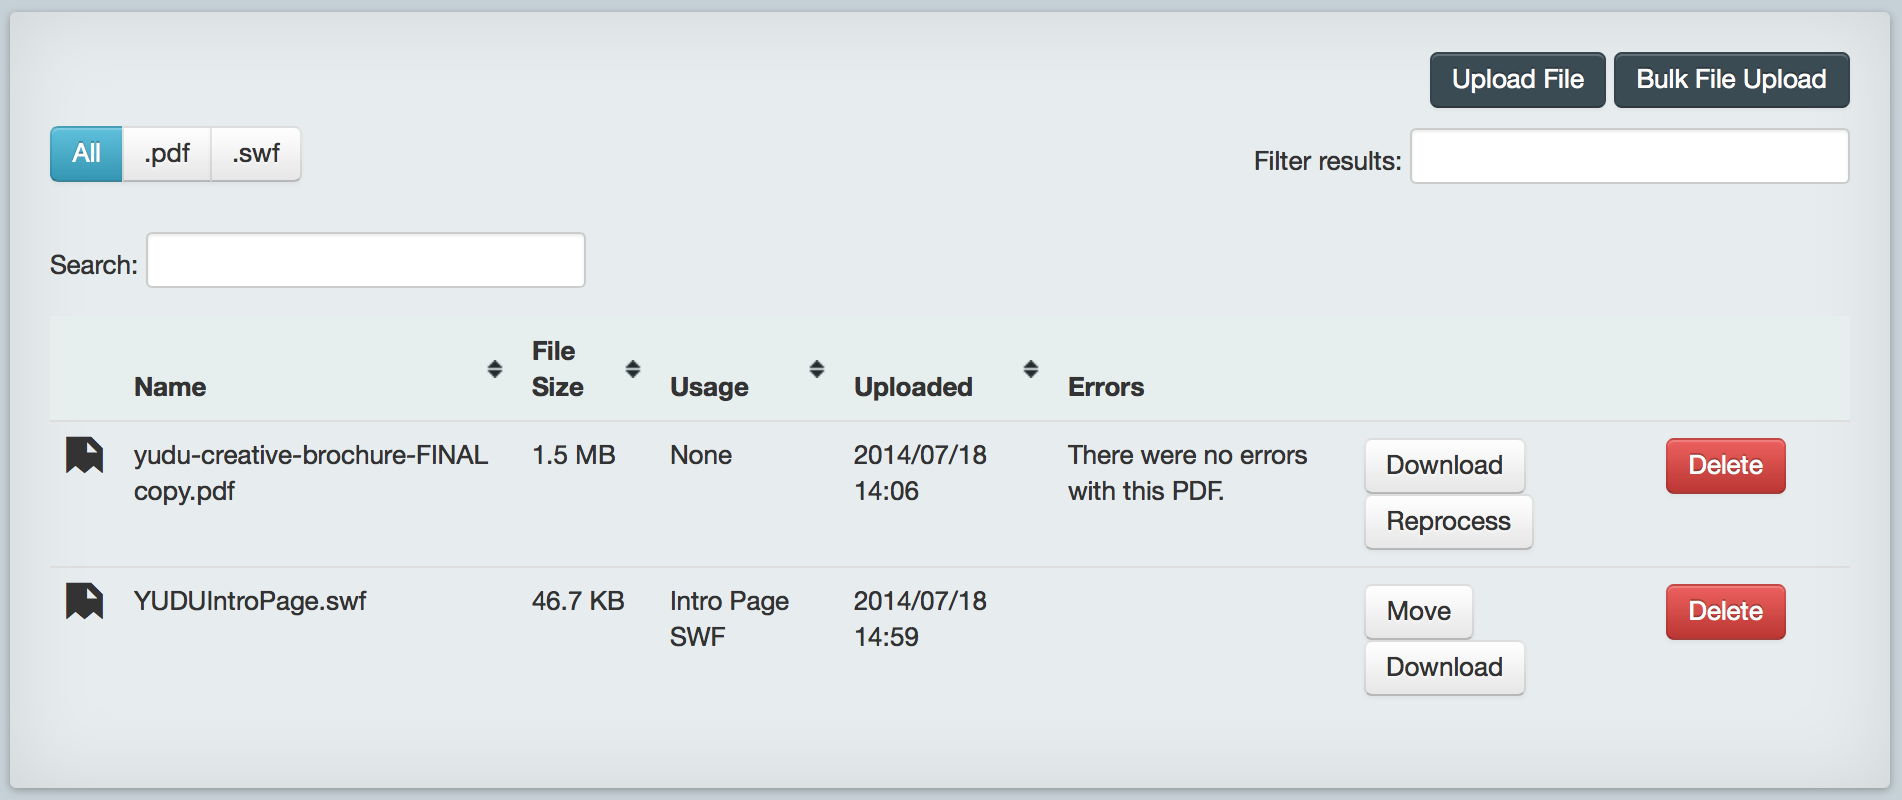
Click on Upload File in the top right and select the file that you wish to upload to YUDU Publisher (see Optimise Your Files before you upload).
Now that the files have been uploaded, they are ready to be embedded on page using the Overlay Editor (see Adding Overlays).
You have the following tool options within the overlay editor for adding multimedia content (listed in the order that they appear):
HTML LightBox Overlay - select this tool to add HTML content within a lightbox. This can also be used to stream YouTube and other URL-based content into a pop-up lightbox. See here for more info.
HTML Overlay - select this tool to add HTML content directly to the page. It can also be used to stream YouTube and other URL-based content into an overlay on the page. See here for more info.
URL Content Overlay - this tool can also be used to stream URL-based content onto the page.
Video Content Overlay - this tool can be be used to embed MP4 video content on-page.
Image Content Overlay - this tool can be used to embed additional images on page, such as buttons. However, if using the HTML LightBox Overlay type, the ability to add a button image is built into that option.
Audio Content Overlay - this tool can be used to embed MP3 audio on page. Please note that you can also trigger audio content to play, so that the audio player is invisible until a trigger or "play" button is pressed - see below.
Below is an image of an overlay that has been created on a page using the keyboard shortcut "C" and by dragging a box over the area that needs to contain the multimedia:
This triggers an action box for the multimedia element that includes the following:
- Delete - (trash icon in the top-right) allows you to remove the overlay that you have selected.
- Height/Width - manually tweak the dimension of the overlay by inputting specific values.
- X-axis/Y-axis position - manually tweak the location of the overlay by inputting specific values for the x- and y- axes.
- Lower and Raise - allows you to place multiple overlays and bring the current overlay to the surface or move it beneath another overlay.
- Source File - select the file that you have uploaded to the digital publication from the Files section. The alternative is to Stream multimedia into the overlay, such as a YouTube video or remotely hosted content by using the overlay type "URL Content Overlay" listed on the top toolbar.
- Options that allows you to do such things as maintain the aspect ratio of the content, automatically play when viewed, and embed when saving the offline version are available if you use overlay types Video, Image and Audio Content Overlays also located on the top toolbar.
The above is only a brief overview of the options and we thoroughly recommend experimenting with the various overlay types and their unique options to familiarise yourself with the platform and get the best from your content.
Stream Content
To stream content, select the URL Content Overlay tool from the toolbar (cloud and play button icon), draw out your overlay box as usual and in the Source URL section of the menu that appears simply place the URL of the content that you wish to stream into the overlay.
The streaming option also exists in the action box for the HTML Lightbox and HTML Overlay types.
Please Note: you will need a direct link to the content and not a redirect.
Trigger Content
Sometimes the space on a page is limited or you might prefer to keep your multimedia content hidden until triggered by the end user. If so, then we can use the Overlay Editor to add a button or designated area that triggers the visibility of your multimedia.
To trigger a multimedia file, you must first place the button on the page as an overlay. This would usually be a JPEG or PNG image, but if the button is part of the PDF then you can place an empty trigger overlay over that region of the page.
Above we have used a "Watch trailer" button as our trigger. You can also see that Use content aspect ratio is ticked.
Unload when hidden and Embed content offline - these are not essential but useful.Next we need to place the content on the page that we wish to trigger. In the above image,you will see the video still "what if?" - this is a Video Content Overlay with your uploaded MP4 video file (see "Uploading Multimedia") selected in the "Source File" box.
When the multimedia is placed on the page, we need to select the "Watch trailer" overlay and select the "Trigger Visibility of Other Content" tick-box followed by selecting the video file in the "Triggered Overlay" dropdown box below it. Tick Trigger visibility of other content option, and then select the content you want the button to enable (e.g. the video file).
You can also use the Alternate State Enabled option to display an alternate trigger button such as a stop button if you wish. The button image will switch to the Alternate State upon clicking/tapping the trigger button.
Remember: you don't need to save every single page once you've finished working on them. Use the keyboard shortcuts CTRL + < or > to move left/right through your document pages adding further enhancements. Once you're happy with the edits, CTRL + S will save the entire project.
When you're ready to check your work, generate a preview link via the Publish screen.
Please Note: we recommend saving regularly if you are working on a large project. The good news is that if you do forget to save and see a prompt such as "Your session expired", then simply go to your main tab (the Overlay Editor opens in a new tab window), refresh your screen to login again and then come back to the Overlay Editor tab you should have left open. Hit OK on the prompt and then try to save again. Your work is stored in local cache meaning you will not lose your overlays!