DNS, or Domain Name System, is a server that translates domain names like apple.com to IP addresses, a numerical sequence of numbers that can locate servers on the internet. Your ISP has its own DNS server that is used by default on all your iOS devices, but you can also point it to a different DNS server.
Why would you want to change the default DNS server for the purposes of reading digital content?
Most ISP's DNS servers aren't fast enough, and because DNS lookups are performed very often this could impact your reading experience. Furthermore, if the DNS security is particularly strict this can actually restrict the content that you are able to see, let alone read and download, so it can be very beneficial.
YUDU recommend changing to the Google DNS service, and here are the instructions on how to do this.
Note: screenshots and instructions taken from Windows 8.1. Most Windows versions are similar but earlier versions of the operating system may differ slightly.
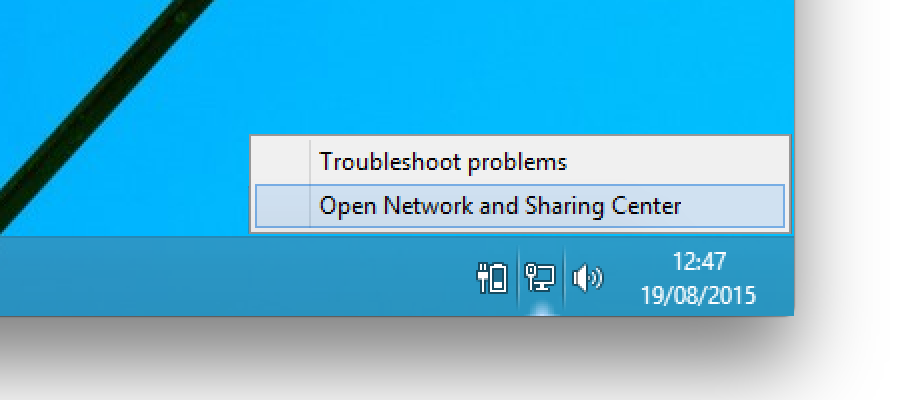
To begin, right click the network icon in the bottom right corner and select Open Network and Sharing Centre

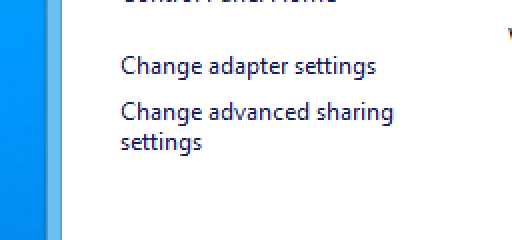
From the left side menu select Change advanced sharing settings

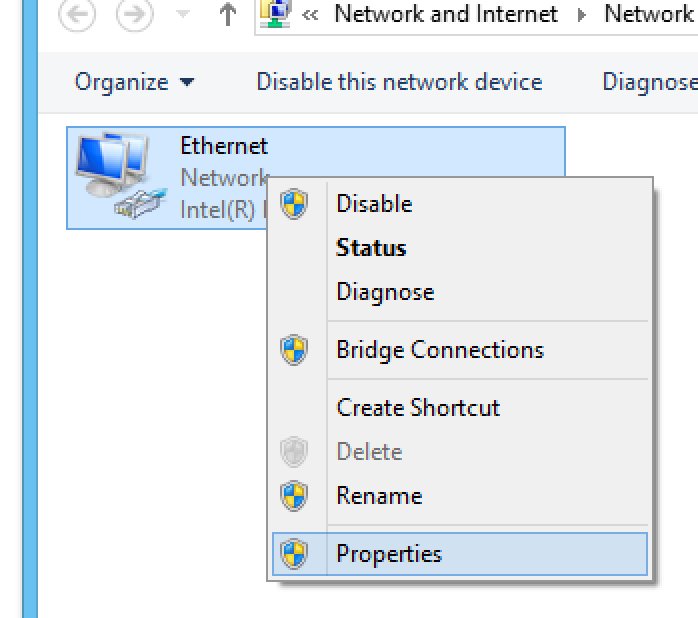
Right click the connection that you would like to change (Wi-Fi if you are wireless or Ethernet if you are connect by a cable) then select Properties

Scroll down and click once on Internet Protocol Version 4 (TCP/IPv4) then select Properties

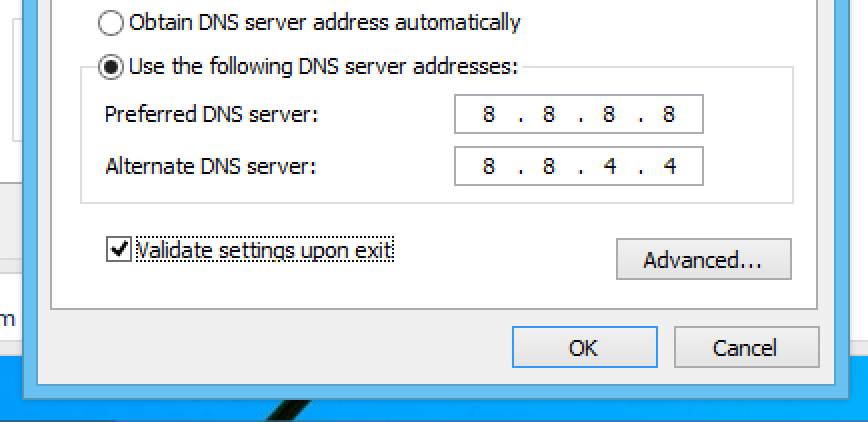
At the bottom of the screen, select the radio button Use the following DNS server addresses and punch in the numbers as below (tick Validate settings upon exit to ensure they work correctly).

Click OK in the bottom right corner to confirm your changes and you are good to go.